Activate secure TLS communication on email inbox • Outlook
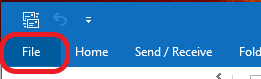
Step 1
Open Outlook and select the menu item 'File'.
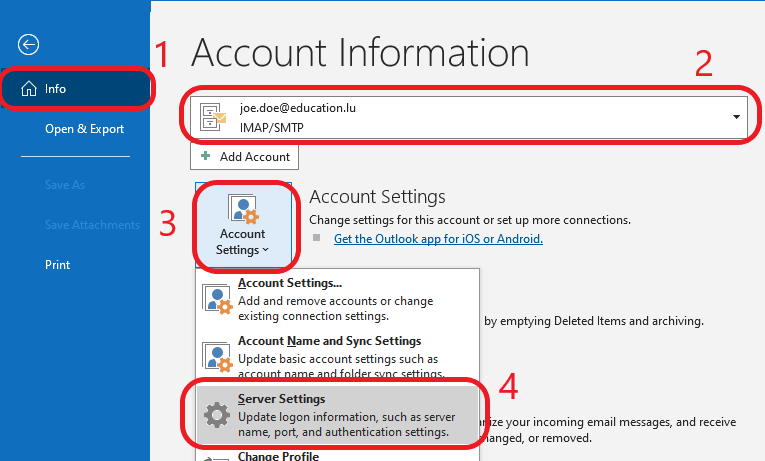
Step 2
- In the menu, select 'Info'. (1)
- Use the drop-down menu under 'Account information' to select the account you want to change. (2)
- Click on 'Account Settings' icon. (3)
- Select 'Server Settings'. (4)
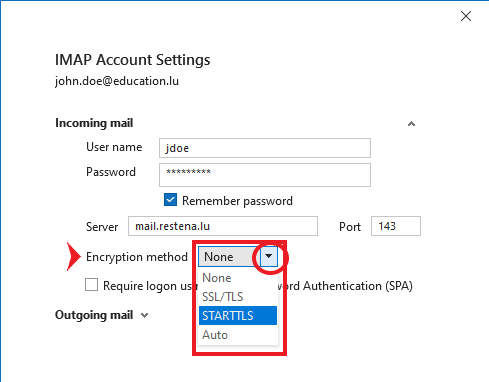
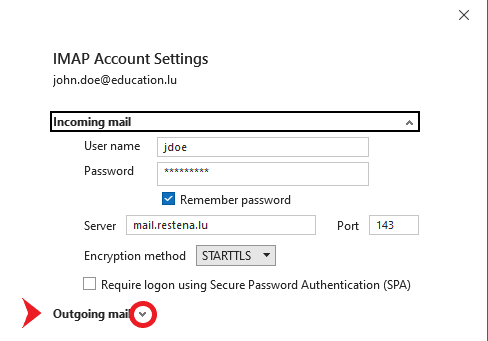
Step 3
Under 'Incoming Mail', under 'Encryption Method', change 'None' to 'STARTTLS'.
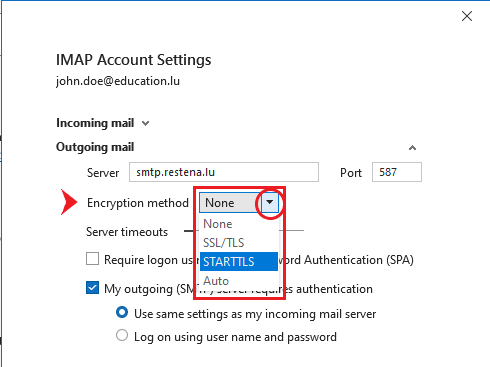
Step 4
Click on 'Outgoing emails' to go to the outgoing mail server settings.
Step 5
Under 'Outgoing Mail', under 'Encryption Method', change 'None' to 'STARTTLS'.
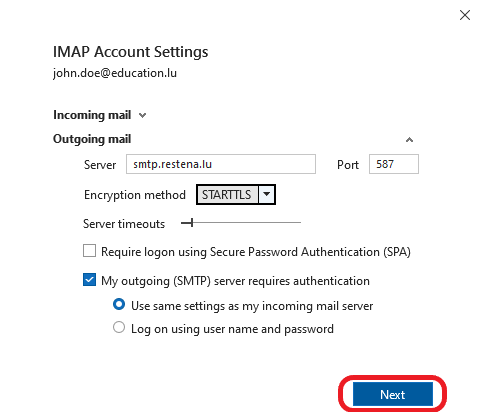
Step 6
When you're done updating your settings, select Next.
Step 7
After you click on 'Next', Outlook checks the connections to the mail servers again. When Outlook is finished, click on 'Done'.